NAV/COM Radio Panel
Programming Instructions
Control your NAV/COM Radio Frequencies with this Inexpensive Switch Panel
Programming Instructions
Control your NAV/COM Radio Frequencies with this Inexpensive Switch Panel


Links to aviation directory
resources & information websites


Desktop Aviator HOME Page
International Shipping Info

Updated 12-25-2015
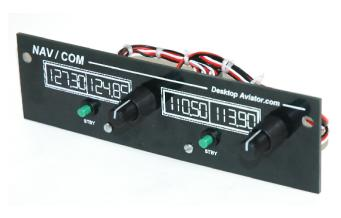
Thank you for your purchase of our Model 2660 NAV/COM Raidio Switch Panel. The 2260 is supported by all Windows Operating Systems (OS).
The Panel itself supports FSX, FSUIPC, Prepar3D as well as X-Plane 10.x and higher.
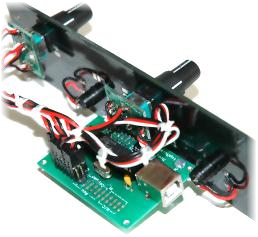
The 2660 makes use of our highly acclaimed Model 2090 Rotary Encoder Circuit Board. With the Manufacturer Default settings seen on the 2090 Utility Software, the 2660 easily supports the 2 Dual Rotary Encoder Switches and the 2 STBY Buttons.
So again, seeing that the 2660 makes use of the 2090 Board, we also include Eight 3-Pin female connectors,
The Panel itself supports FSX, FSUIPC, Prepar3D as well as X-Plane 10.x and higher.
The 2660 makes use of our highly acclaimed Model 2090 Rotary Encoder Circuit Board. With the Manufacturer Default settings seen on the 2090 Utility Software, the 2660 easily supports the 2 Dual Rotary Encoder Switches and the 2 STBY Buttons.
So again, seeing that the 2660 makes use of the 2090 Board, we also include Eight 3-Pin female connectors,
so that you can take advantage of the Eight 10-bit Analog Inputs. These analog inputs can be connected to any 100K ohm Rotary or Slide Potentiometer and programmed to any function need a potentiometer for its operation. Wiring and programming the Potentiometers can be found HERE.
Installation of the 2660 Panel
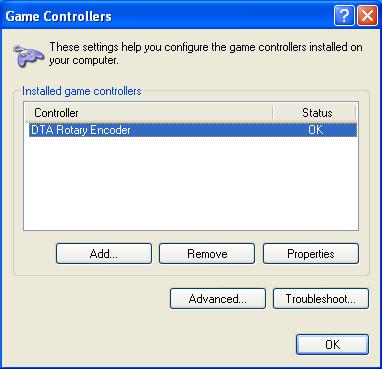
With the purchase of your 2660 Panel, you also received a USB Cable. Plug the cable into the circuit board on the back of the 2660. With your Windows computer running, plug the other side of the cable into an unused USB Port. When pluged in, the computer will "see" the Panel and load the appropriate Driver Software. The 2660 is seen by the computer as a Joystick. With the Driver loaded and running, if you wish, you can go into the Game Controller window found in the Calibration Window, and click on DTA Rotary Encoder. You will then see a window as seen below.
With the purchase of your 2660 Panel, you also received a USB Cable. Plug the cable into the circuit board on the back of the 2660. With your Windows computer running, plug the other side of the cable into an unused USB Port. When pluged in, the computer will "see" the Panel and load the appropriate Driver Software. The 2660 is seen by the computer as a Joystick. With the Driver loaded and running, if you wish, you can go into the Game Controller window found in the Calibration Window, and click on DTA Rotary Encoder. You will then see a window as seen below.
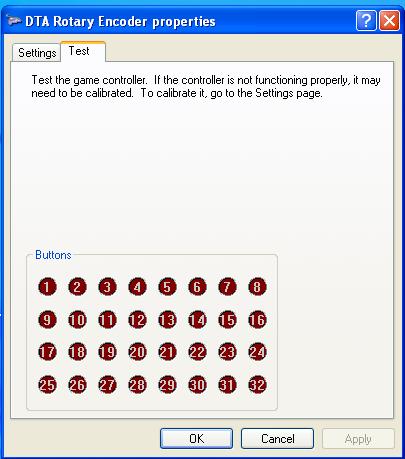
You can now turn the encoder switches and see the appropriate RED Buttons flash for about .25 seconds. When pressing the GREEN Stby buttons, you will se a constant ON condition until you remove your finger from the button.
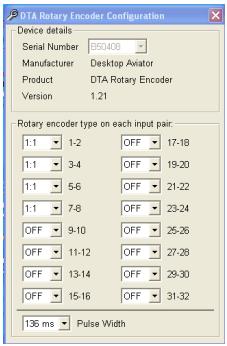
The 2090 Utility Program
The 2660 is programmed for optim preformance is the settings seen to the right. But if you wish to experiment with the settings, you can do so by downloading a copy of the
2090 Utility Software.
With the software, you can easily change the Width of the pulse generated by the 2090 board. By making the time higher, the output pulse is made much wider; if made smaller, the width is smaller, thus the pulse is faster. We find that the Pulse width is 132msec is the best setting for both FSX and X-Plane flight simulators.
The Rotary Type window now showing 1:1 can also be changed is so desired. But again, 1:1 is best suited for the encoder switches.
Change Pulse Width HERE

2660 Serial Number

Installing the 2600 into X-Plane
The 2600 Panel is supported by X-Plane version 10.x or higher. All needed functions can be found on the Setting window. So lets go!
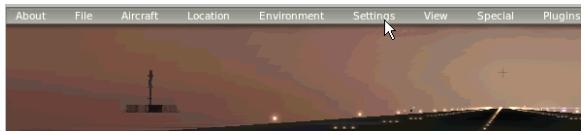
With the 2660 Panel plugged into the USB Port on the computer, RUN your copy of X-Plane. With the main X-Plane window showing, take your mouse and bring the Arrow to the upper most edge of the screen. When there, an Option List will appear, Click on Settings, then Joystick & Equipment
The 2600 Panel is supported by X-Plane version 10.x or higher. All needed functions can be found on the Setting window. So lets go!
With the 2660 Panel plugged into the USB Port on the computer, RUN your copy of X-Plane. With the main X-Plane window showing, take your mouse and bring the Arrow to the upper most edge of the screen. When there, an Option List will appear, Click on Settings, then Joystick & Equipment
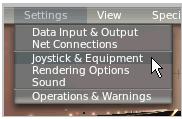

Then click on Buttons: Adv
NAV/COM Radio Functions using X-Plane 10.x (Buttons: Adv)
| STBY Green Button | Push Button | com1_standy_flip |
|
Large Knob CW Large Knob CCW |
Dual Rotary Encoder Switch |
actv_com1_coarse_up actv_com1_coarse_down |
|
Small Knob CW Samll Knob CCW |
Dual Rotary Encoder Switch |
actv_com1_fine_up actv_com1_fine_down |
COM Settings - Left Side of Panel
NAV Settings - Right Side of Panel
| STBY Green Button | Push Button | nav1_standy_flip |
|
Large Knob CW Large Knob CCW |
Dual Rotary Encoder Switch |
actv_nav1_coarse_up actv_nav1_coarse_down |
|
Small Knob CW Samll Knob CCW |
Dual Rotary Encoder Switch |
actv_nav1_fine_up actv_nav1_fine_down |
To locate the X-Plane Settings Window, first drag your Mouse to the very top of your computer sereen. You will see an Option Bar. Find and Click on SETTINGS then Joystick & Equipment then Buttons: Adv
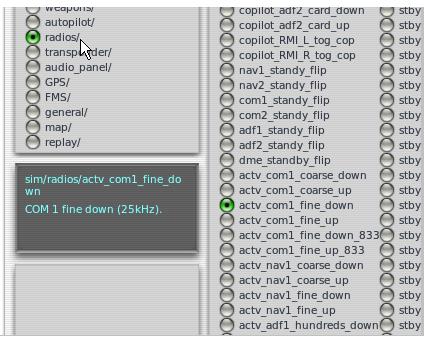
You will then be taken to a full size window showing all flight functions available to you. For the 2660 Panel, only the settings seen in the Radios folder will be used.
From this window, you can program the following functions:
From this window, you can program the following functions:
Frequencies Change HERE

When finished setting all functions, just click on the "X" in the upper right hand side of the screen, This will bring you back to the main X-Plane window.
Now comes the good part; turn any of the encoder Knobs and not the frequency changes on the Radio Stack see on the screen. Press the 2 GREEN Stby buttons and watch the freqs swap from standby to active.
That's all there is to it!
Newer versions of X-Plane has a panel called the X-Plane 430. The Encoder Knobs and STBY buttons on the 2660 can also control the same functions on the 430 Panel.
Below is the X-Plane 430 Panel
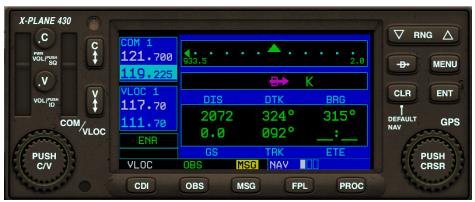
Frequencies Changes can
be seen HERE
be seen HERE


The STBY Buttons on the 2660 will also work with the 430
Should you wish the remaining buttons to work on the 430 Panel, you can use our Model 2040 board; solder push button switches to its input and program the other functions.
Installing the 2660 into FSX/FSUIPC
Your 2660 Panel also supports FSX flight simulator programs running the Licensed version of FSUIPC. FSUIPC is a software enhacement add-on that resides in the Modules Folder inside FSX. With FSUIPC installed, you can increase the number of Flight functions to about 200. Installation instructions for FSUIPC are supplied with the purchase of the required license. The license sells for about $20.00USD.
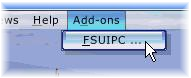
With FSUIPC installed, plug the 2660 Panel into an unused USB Port and run your version of FSX. With FSX loaded and displaying the main screen, press the "alt" key on the computer keyboard. This will bring up an Option Bar on the upper section of the screen. With your Mouse, highlight Add-ons and click on it. You will then see a sub-folder titled FSUIPC; click on that folder
Your 2660 Panel also supports FSX flight simulator programs running the Licensed version of FSUIPC. FSUIPC is a software enhacement add-on that resides in the Modules Folder inside FSX. With FSUIPC installed, you can increase the number of Flight functions to about 200. Installation instructions for FSUIPC are supplied with the purchase of the required license. The license sells for about $20.00USD.
With FSUIPC installed, plug the 2660 Panel into an unused USB Port and run your version of FSX. With FSX loaded and displaying the main screen, press the "alt" key on the computer keyboard. This will bring up an Option Bar on the upper section of the screen. With your Mouse, highlight Add-ons and click on it. You will then see a sub-folder titled FSUIPC; click on that folder

Click HERE and Get this Folder

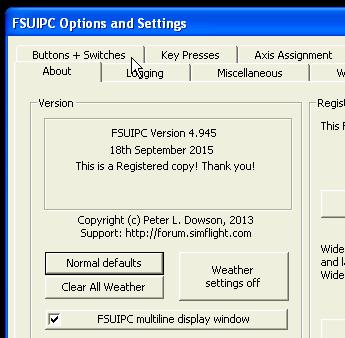
After clicking on FSUIPC folder, you will be taken to the FSUIPC Options and Setting window. Click on Buttons + Switches.
When selected, you will now see the window where the 2660 Panel functions are to be programmed.
These settings can be seen below
When selected, you will now see the window where the 2660 Panel functions are to be programmed.
These settings can be seen below
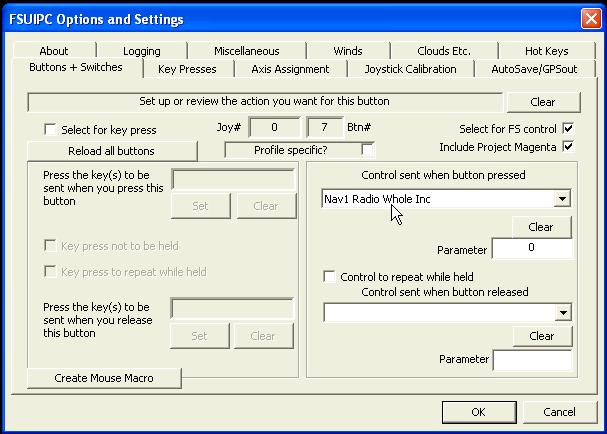
Click on these two options

Click HERE to display the List of ALL Flight Functions FSUIPC supports

When turning the knobs on the Rotary Encoder Switches or pressing the Stby Button; the USB Button # will appear here

| STBY Green Button | Push Button | COM STBY Radio Swap |
|
Large Knob CW Small Knob CCW |
Dual Rotary Encoder Switch |
COM Radio Whole Inc COM Radio Whole Inc |
|
Small Knob CW Small Knob CCW |
Dual Rotary Encoder Switch |
COM Radio Fract Inc COM Radio Fract Dec |
| STBY Green Button | Push Button | NAV1 Radio Swap |
|
Large Knob CW Large Knob CCW |
Dual Rotary Encoder Switch |
NAV1 Radio Whole Inc NAV1 Radio Whole Dec |
|
Small Knob CW Samll Knob CCW |
Dual Rotary Encoder Switch |
NAV1 Radio Fract Inc NAV1 Radio Fract Dec |
NAV/COM Radio Functions using FSUIPC (Buttons & Switches)
NAV Settings - Right Side of Panel
COM Settings - Left Side of Panel
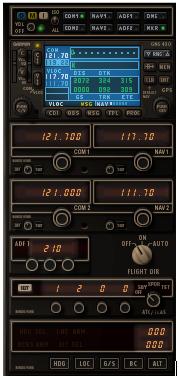
For FSX and Prepar3d, the NAV/COM Radio frequencies can be read on the radio stack display located on your computer screen to the right side of the cockpit panel.
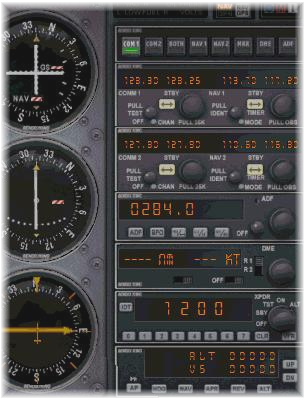
Here is the Radio Stack for the Cessna 172. When turning either Rotary Encoder knob, the radio frequency changes can be seen here. Just set to the required freq, then press the Stby button to flip from Standby to Active Frequency.