
Desktop Aviator HOME Page
International Shipping Info

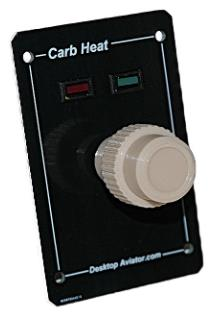
Carb Heat Controller Panel
Model 2940
Wiring & Installation Instructions
Wiring and Installing the 2940 CARB Heat Controller
Installing the Carb Heat Controller requires very little time. All you need is an unused USB Port. Additional Ports can be added to your computer by using a device called a USB Hub. These Hubs can be purchased for as little as $20.00 in the Internet. Just plug a USB Cable Series "B" into the jack on the 2940, then into the USB Port on your computer. The computer will sense the Controller and load the required software for its proper operation. The 2940 will be sensed as "Carb Heat".
To verify that you computer has accepted the Interface, you can goto the "Game Controller" window. To do this, just click on "START" (located in the lower left hand corner of the computer s monitor); then click on "Control Panel"; then "Game Controller".
Using Computers with Operating Systems like Win 7, Win 10 ect, the procedure for displaying the Game Controller is different then described. Using a Win XP, your computer should display the following in the Properties Window.:
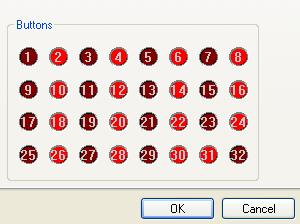
To the right is the Carb Heat window shown in the Calibration Window showing most of the available inputs.
When pulling and pushing on the Carb Heat switch, RED Buttons #31 and #32 will light. These are the 2 USB Outputs that are configured to control the Carb Heat
The remaining inputs can be wired to a standard on/off Rocker and/or Toggle switch
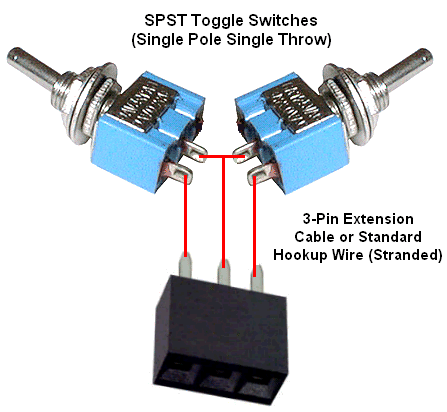
To make use of all the features the 2940 has to offer, you can take a handfull of SPST (on/off) switches and wire them to the supplied 3-pin Female Connectors Note: Two switches for each connector. For full operation, you need to make 7 Switch Assemblies as seen to the right.

Center Pin
Ground (x6)
Ground (x6)


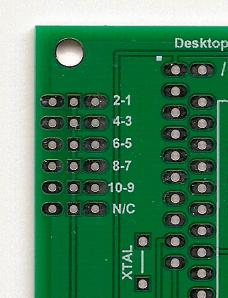
Silkscreened Pin Numbers
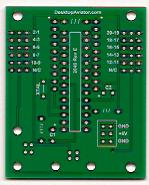
To the Right is a diagram showing a bare circuit board with the silkscreened pin numbers. There are 3 male terminals for each row of pins. The center row is the Common Ground. With the 7 switch assemblied complete, plug the 3-pin connector into these connectors. The Available Switch inputs are as follows:
| Pins #2 and #1 | Unavailable | |
| Pins #4 and #3 | Unavailable | |
| Pins #6 and #5 | Carb Heat Control | |
| Pins #8 and #7 | Pins #14 and #13 | |
| Pins #10 and #9 | Pins #12 and #11 |
LEFT Side of Board
RIGHT Side of Board
When the switch assemblies are connected to the board and the board is plugged into your computer's USB Port, you can now cinfigure each switch to a needed flight function
All switch configurations are made in the SETTINGs window of your flight sim program. Although only sample setting are seen, the procedure will change depending on the flight sim you are using. Right now, all major flight sime are supported. This included FSX, FSX se, X-Plane 10/11 and the New MS2020
To configure the Carb Heat, look for a setting function similar to:
Carb Heat ON
Carb Heat OFF
Please note that the Carb Heat Knob icon on the flight sim screen might not show the setting of the switch, but the function is ON or OFF depending on the push/pull switch. Whether the Carb Heat is seen in or out on the screen depends on the programming of the aircraft you are flying at the time. It might be supported not not.
The remaining toggle (or Rocker) switches can be configured to flight functions as:
Landing Lights on
Landing Lights off
Pitot Heat on
Pitot Heat off
Landing Lights on
Landing Lights off
Pitot Heat on
Pitot Heat off
